Online-Handbuch
- Wie man das Programm herunterlädt
- Wie man das Programm installiert
- Einstellungs-Assistent
- Wie man die Lizenz registriert
- So stellen Sie das Senden von Protokollen zur Online-Überwachung ein (über einen beliebigen Web-Browser)
- Einstellung der Sendeprotokolle
Das Programm muss auf dem Computer installiert sein, den Sie überwachen möchten.
1. Wie man das Programm herunterlädt
You can download any Spyrix program here at any time: spyrix.com/download.php. Choose a program and click on the “Download” button.
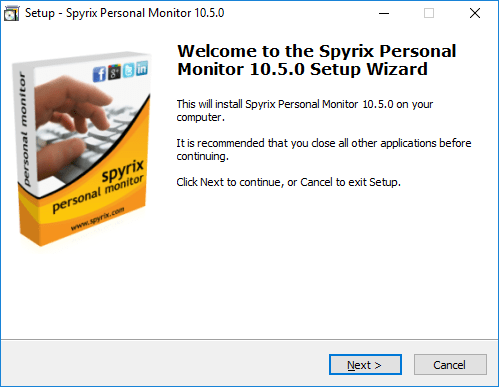
2. Wie man das Programm installiert
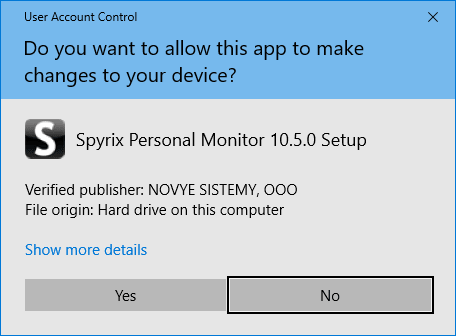
Sobald der Download abgeschlossen ist, klicken Sie auf die heruntergeladene Datei, um die Installation zu starten. Klicken Sie auf "Ja", wenn Sie vom System dazu aufgefordert werden.
Wählen Sie die Sprache

Click "Next"
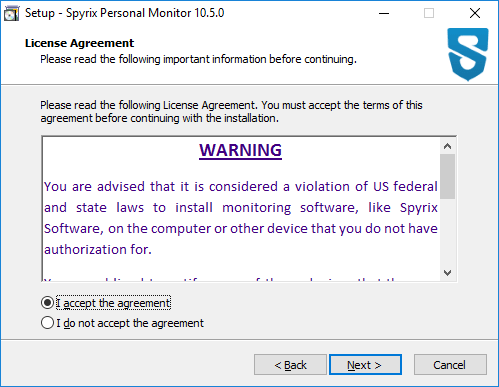
Choose "I accept the agreement" and click "Next"
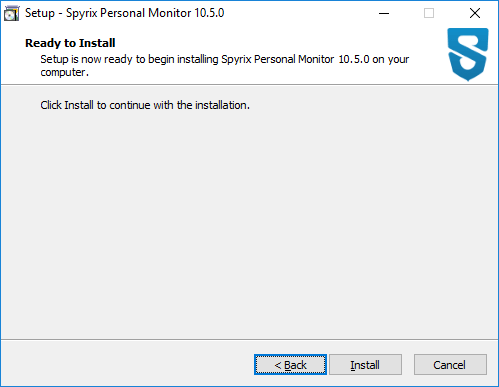
Click "Install" and wait for the installation to finish
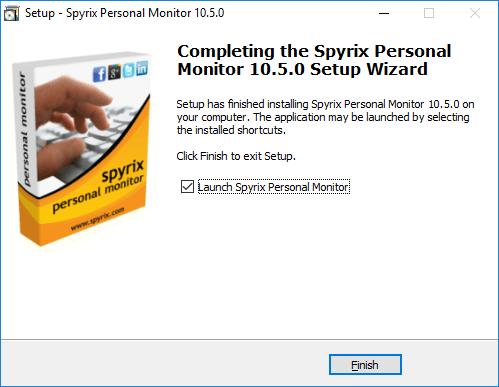
Click "Finish" to complete the installation. The program will launch automatically after that.
3. Einstellungs-Assistent
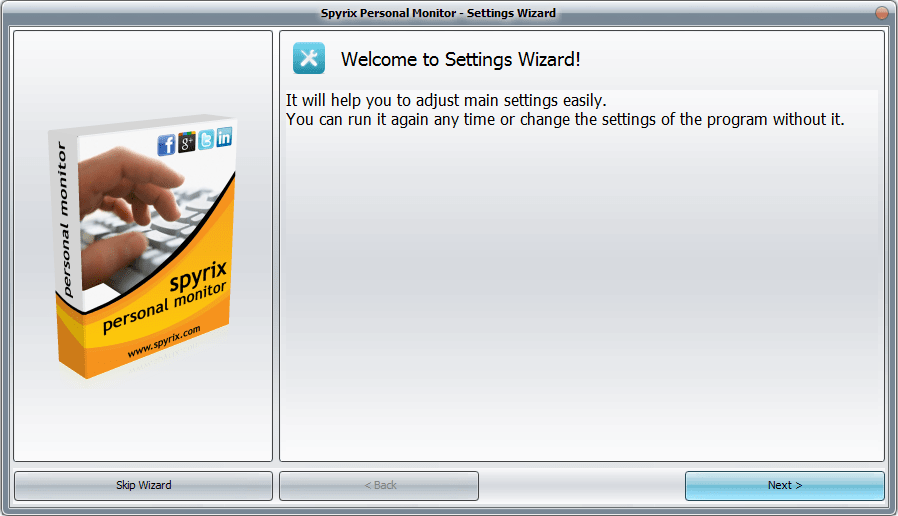
After the installation the program will launch the Settings Wizard. If you do not want to configure any settings you can "Skip Wizard". But it is strongly recommended not to skip it and configure all the settings. The configuration will take a couple of minutes.
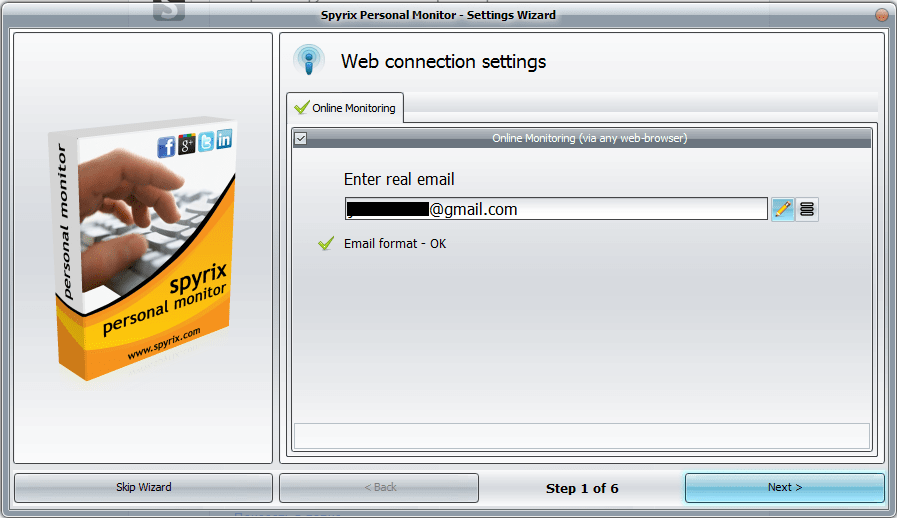
1) Einstellungen der Webverbindung
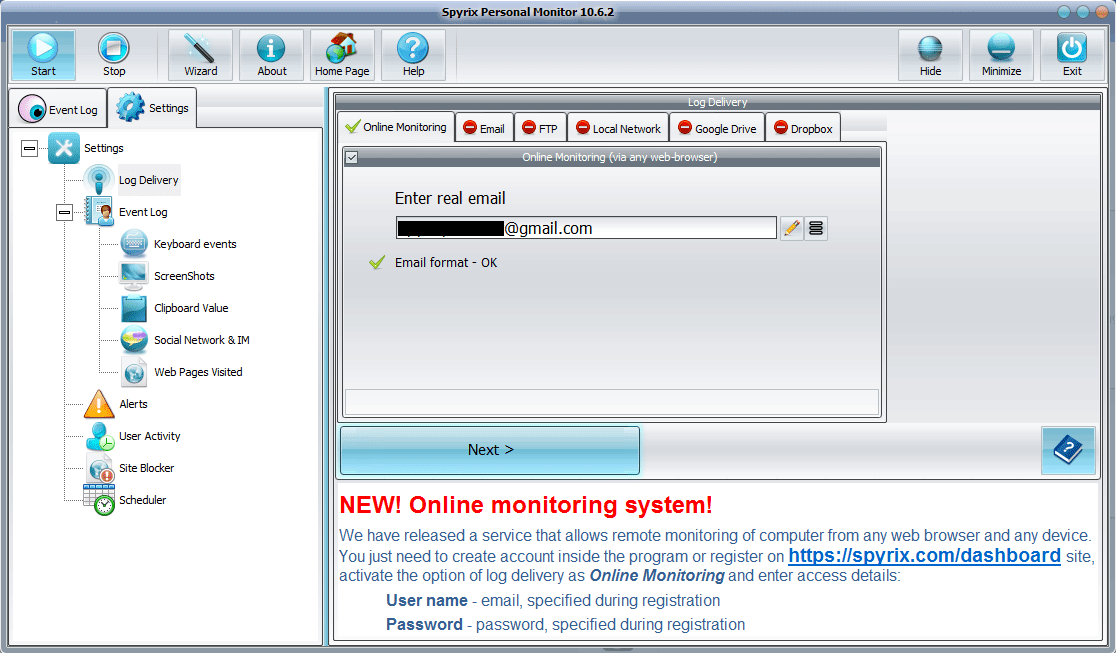
- Check the box next to "Online monitoring (via any web-browser)" to enable it.
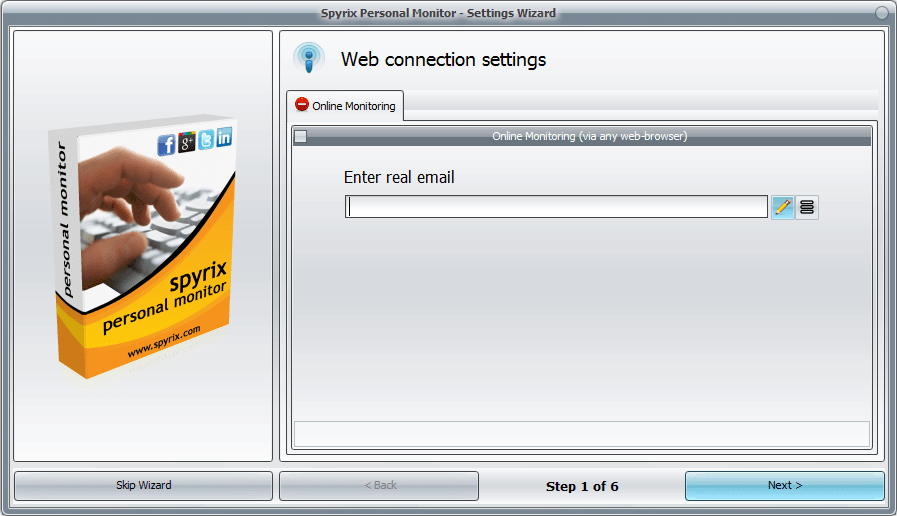
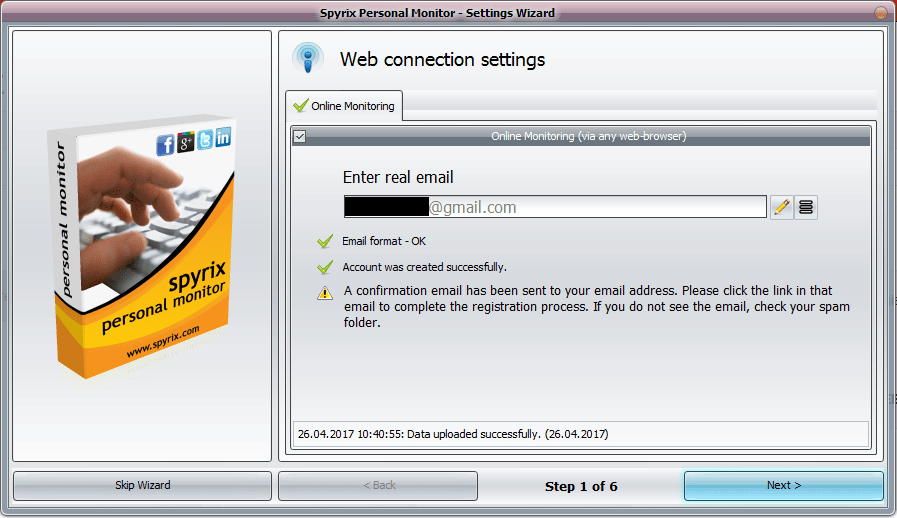
- Enter your email address, wait for the program to check it, and click "Next".
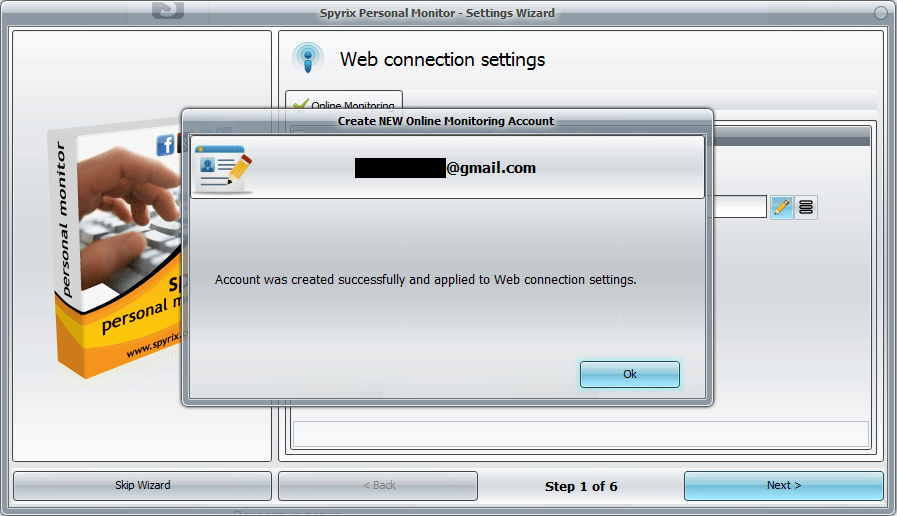
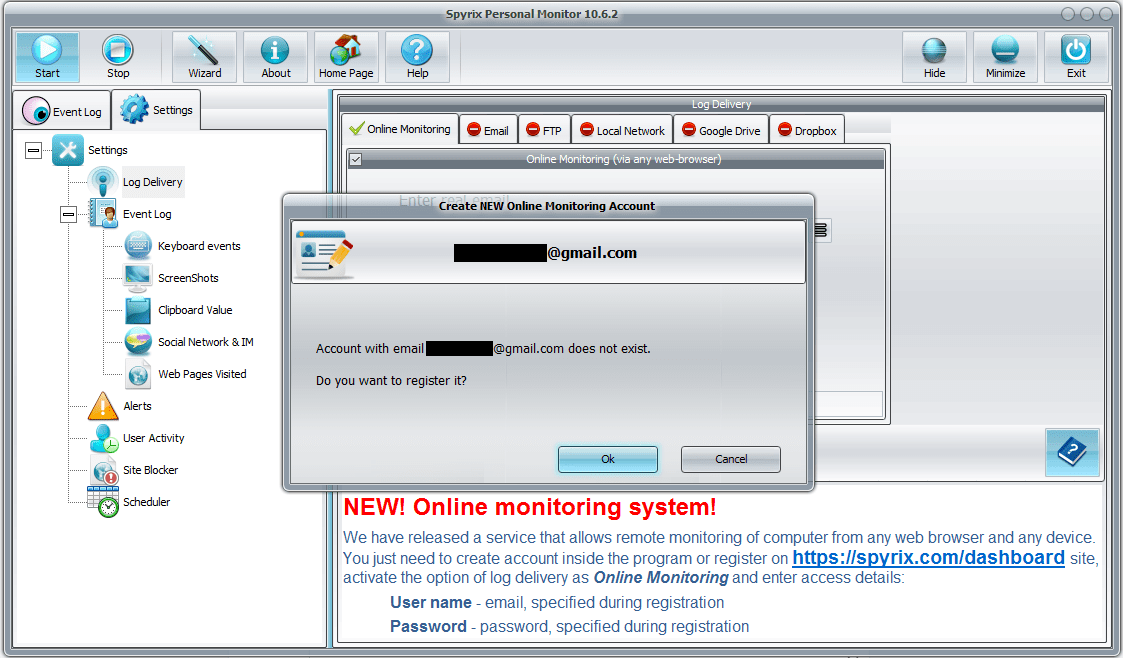
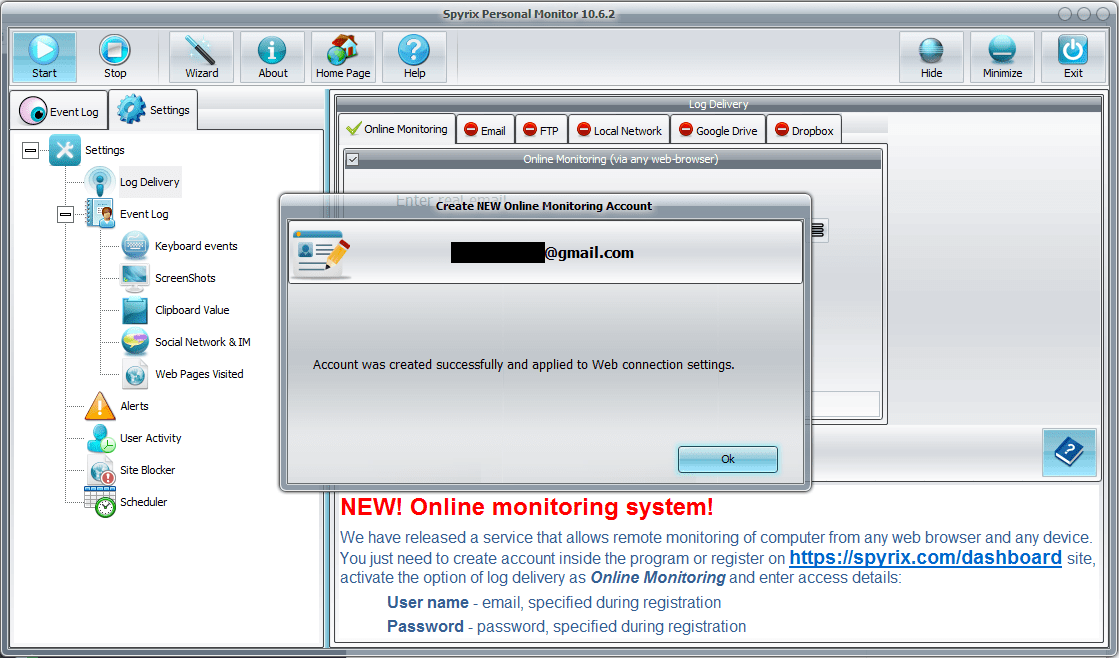
- A new window will open – click "Ok" to create your account.

- Wenn Sie alles richtig gemacht haben, werden Sie diese Meldung sehen:
- Jetzt müssen Sie zu Ihrer E-Mail gehen und Ihr Konto aktivieren.
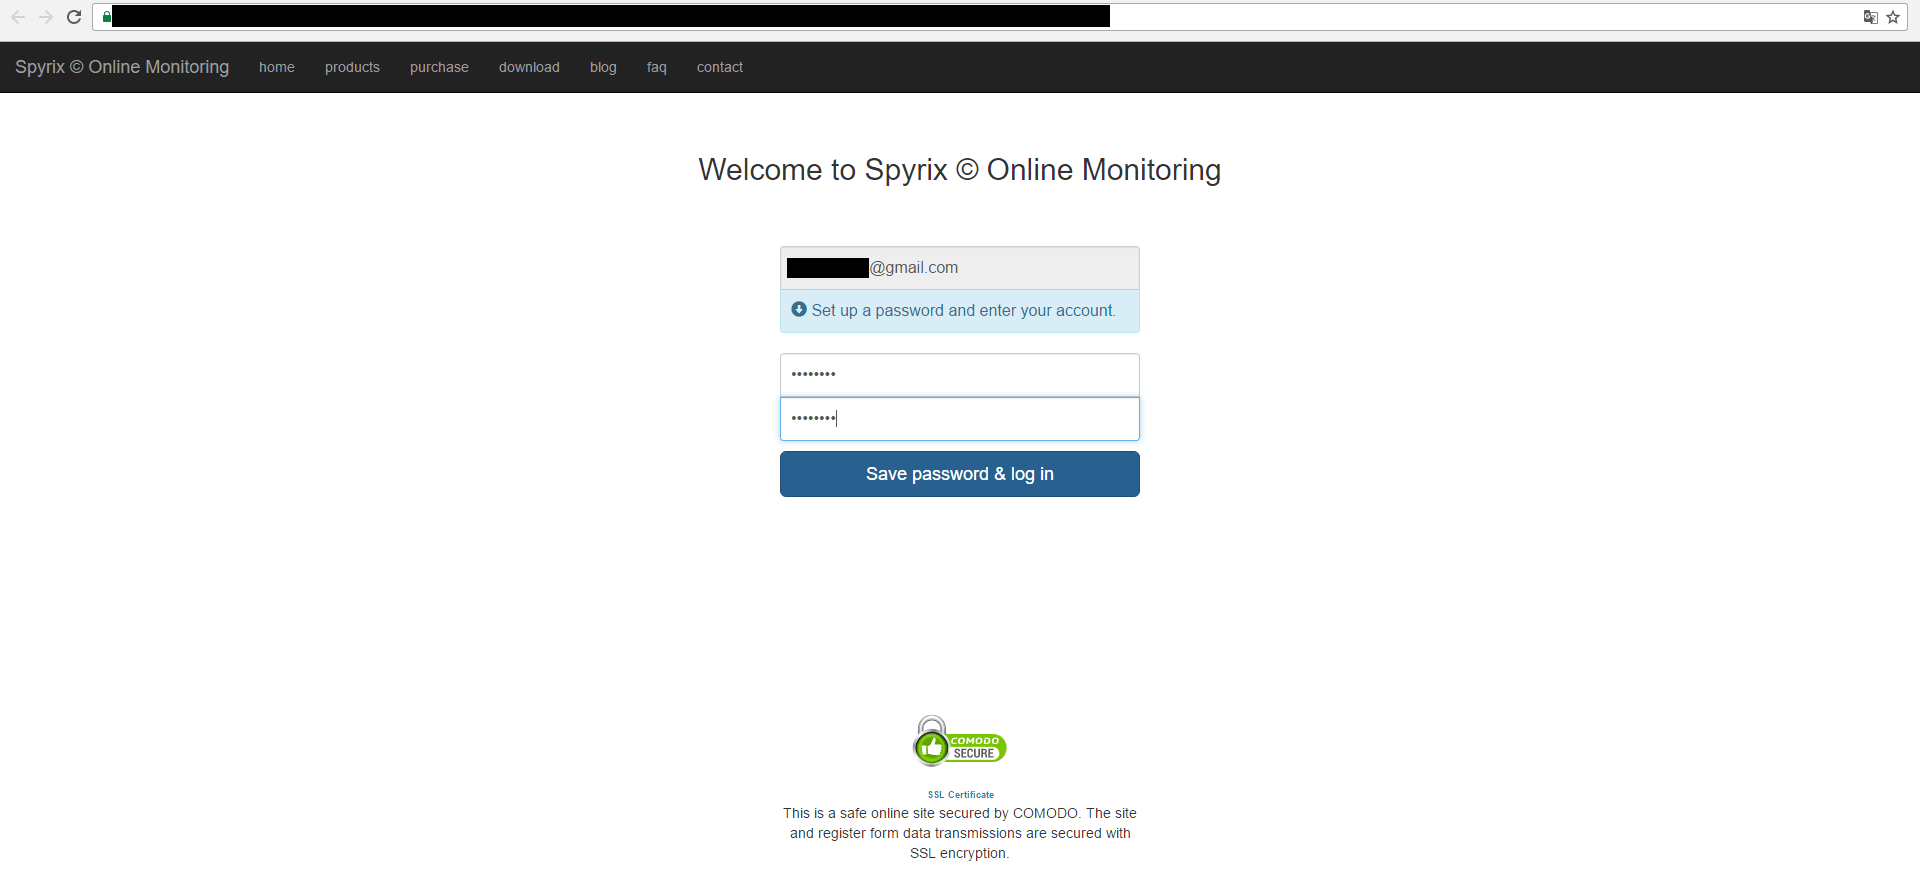
- Wenn Sie auf den Link zur Kontoaktivierung klicken, müssen Sie ein Passwort für Ihr Konto einrichten, um sich anzumelden.
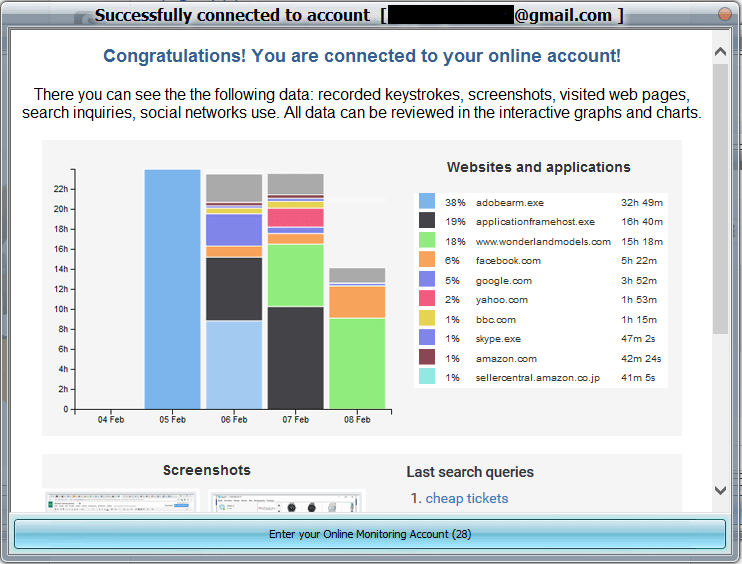
- In wenigen Augenblicken werden Sie die ersten Daten in Ihrem Konto erhalten.
- Click "Next" to go to Step 2 in the Wizard.
Wenn Sie bereits ein Spyrix-Konto haben
- Check the box next to "Online monitoring (via any web-browser)" to enable it.
- Enter your account email address, wait for the program to check it, and click "Next".

- Wenn Sie Ihre Daten korrekt eingegeben haben, wird diese Meldung angezeigt:
- In ein paar Minuten erhalten Sie die ersten Daten auf Ihrem Konto.
- Click "Next" to go to Step 2 in the Wizard.
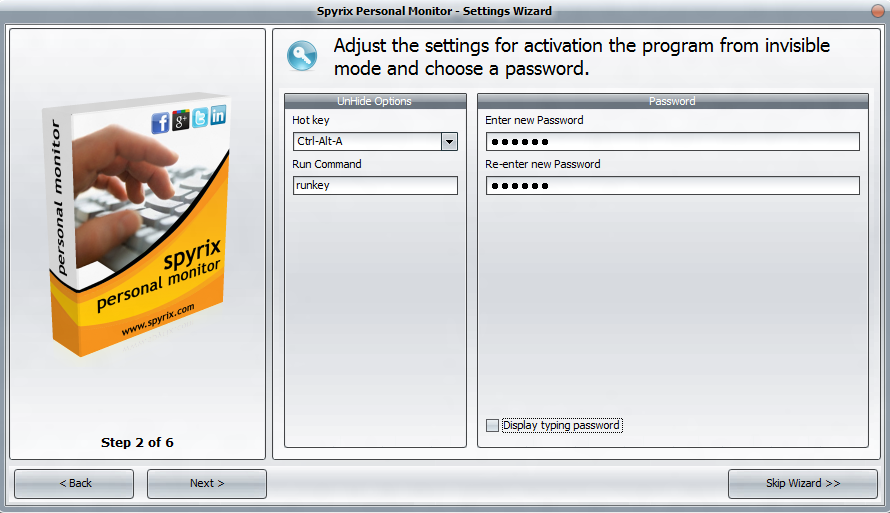
2) Wählen Sie die Hotkeys, um das Programm aus dem versteckten Modus zu holen (oder lassen Sie sie standardmäßig) und erstellen Sie ein Passwort, um das Programm zu aktivieren (nicht notwendig).
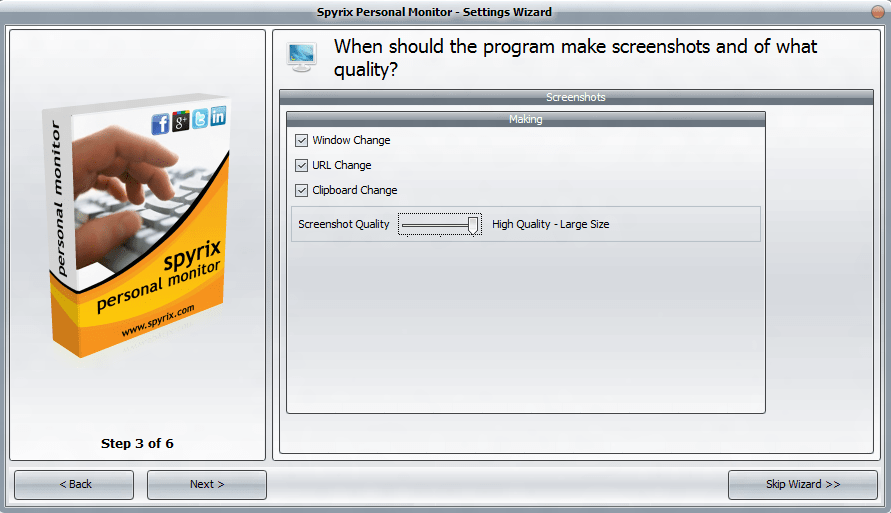
3) Legen Sie die Qualität der Screenshots fest und bestimmen Sie, wann sie gemacht werden sollen.
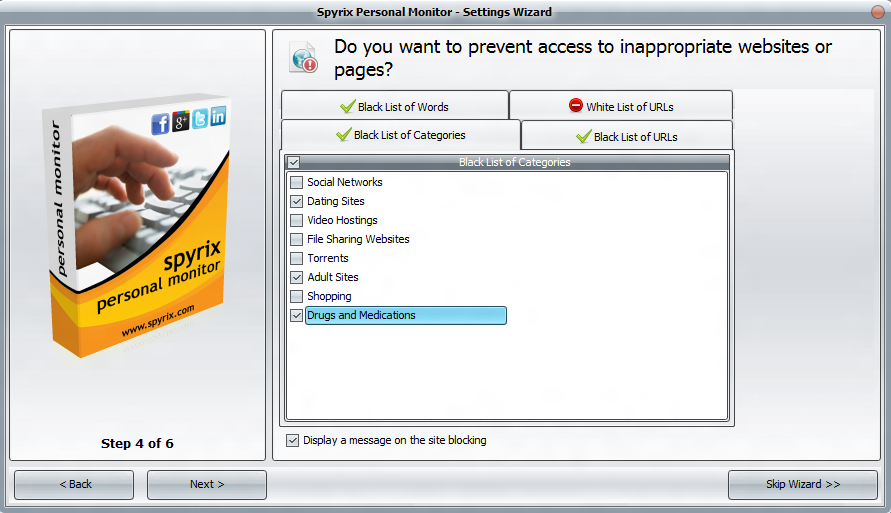
4) Wählen Sie Kategorien oder bestimmte Websites, die gesperrt werden sollen (nicht erforderlich).
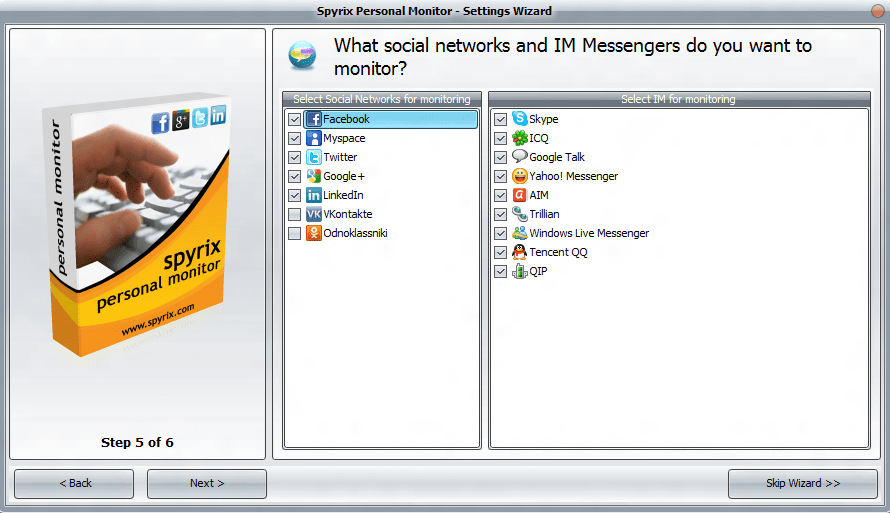
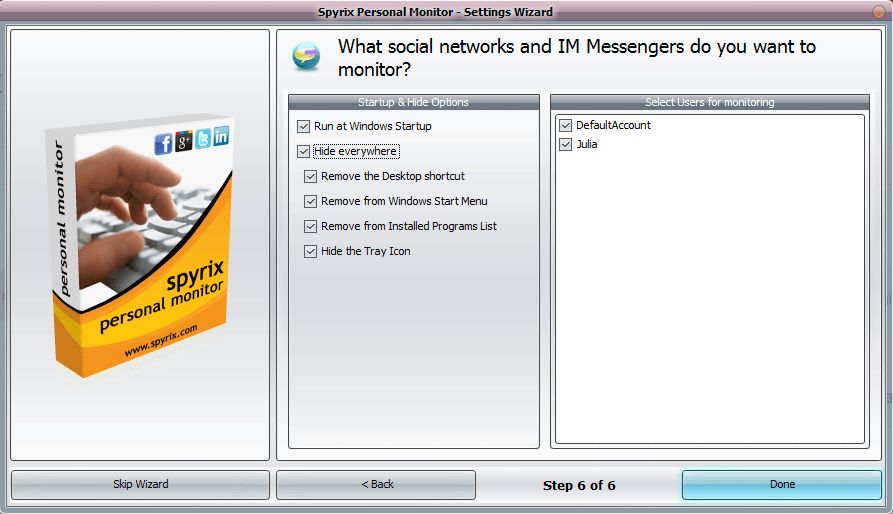
5) Wählen Sie die sozialen Netzwerke und Messenger, die Sie überwachen möchten.
6) Wählen Sie, ob und wie das Programm auf dem Zielcomputer versteckt werden soll. Markieren Sie auch alle Benutzer, die Sie überwachen möchten. Wenn Sie möchten, dass das Programm automatisch ausgeführt wird, lassen Sie das Kästchen "Beim Windows-Start starten" aktiviert.
4. Wie man das Programm registriert
4.1 So registrieren Sie die Lizenz im Programm
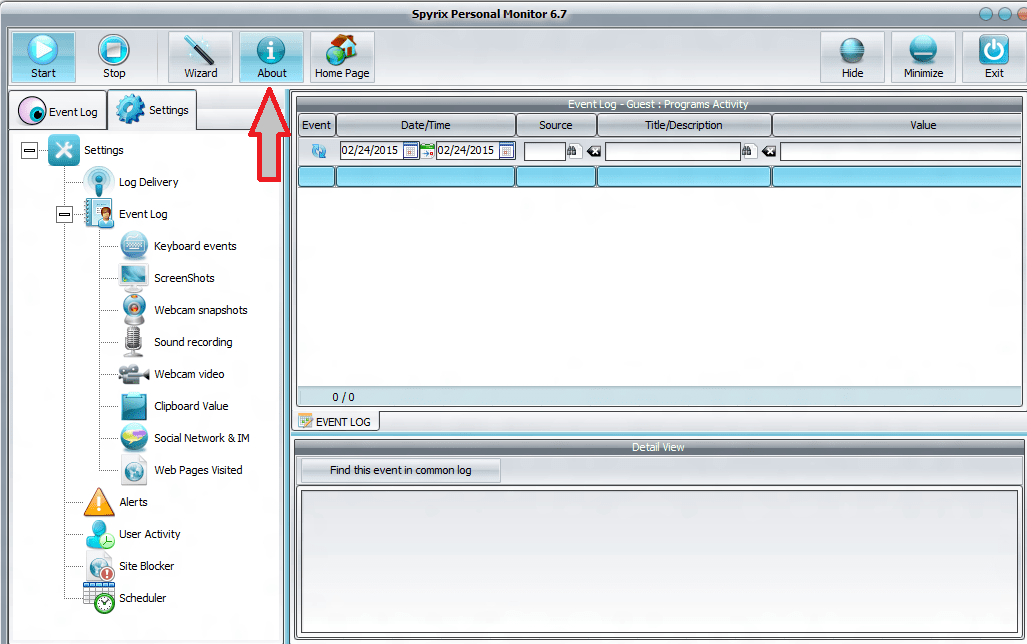
To register your license, click on the "About" button in the program.
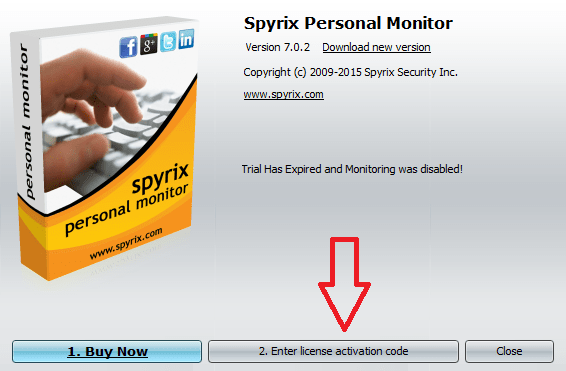
Click "Enter license activation code"
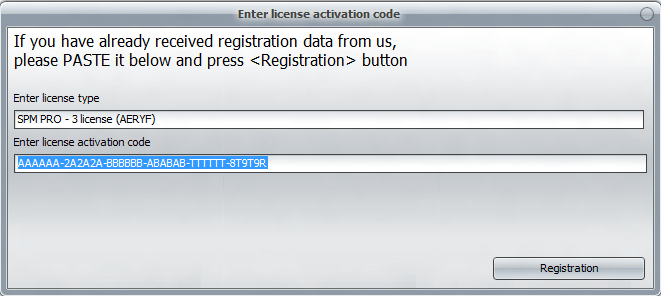
Kopieren Sie den Lizenzcode, den Sie nach dem Kauf erhalten haben, und fügen Sie ihn in die entsprechenden Felder ein. Zum Beispiel:
Lizenz-Typ: SPM00AAAAA
Aktivierungscode: AAAAAA-2A2A2A-BBBBBB-ABABAB-TTTTTT-8T9T9R
Sie sollten diesen Schlüssel kopieren und in die entsprechenden Felder eingeben. Zum Beispiel:
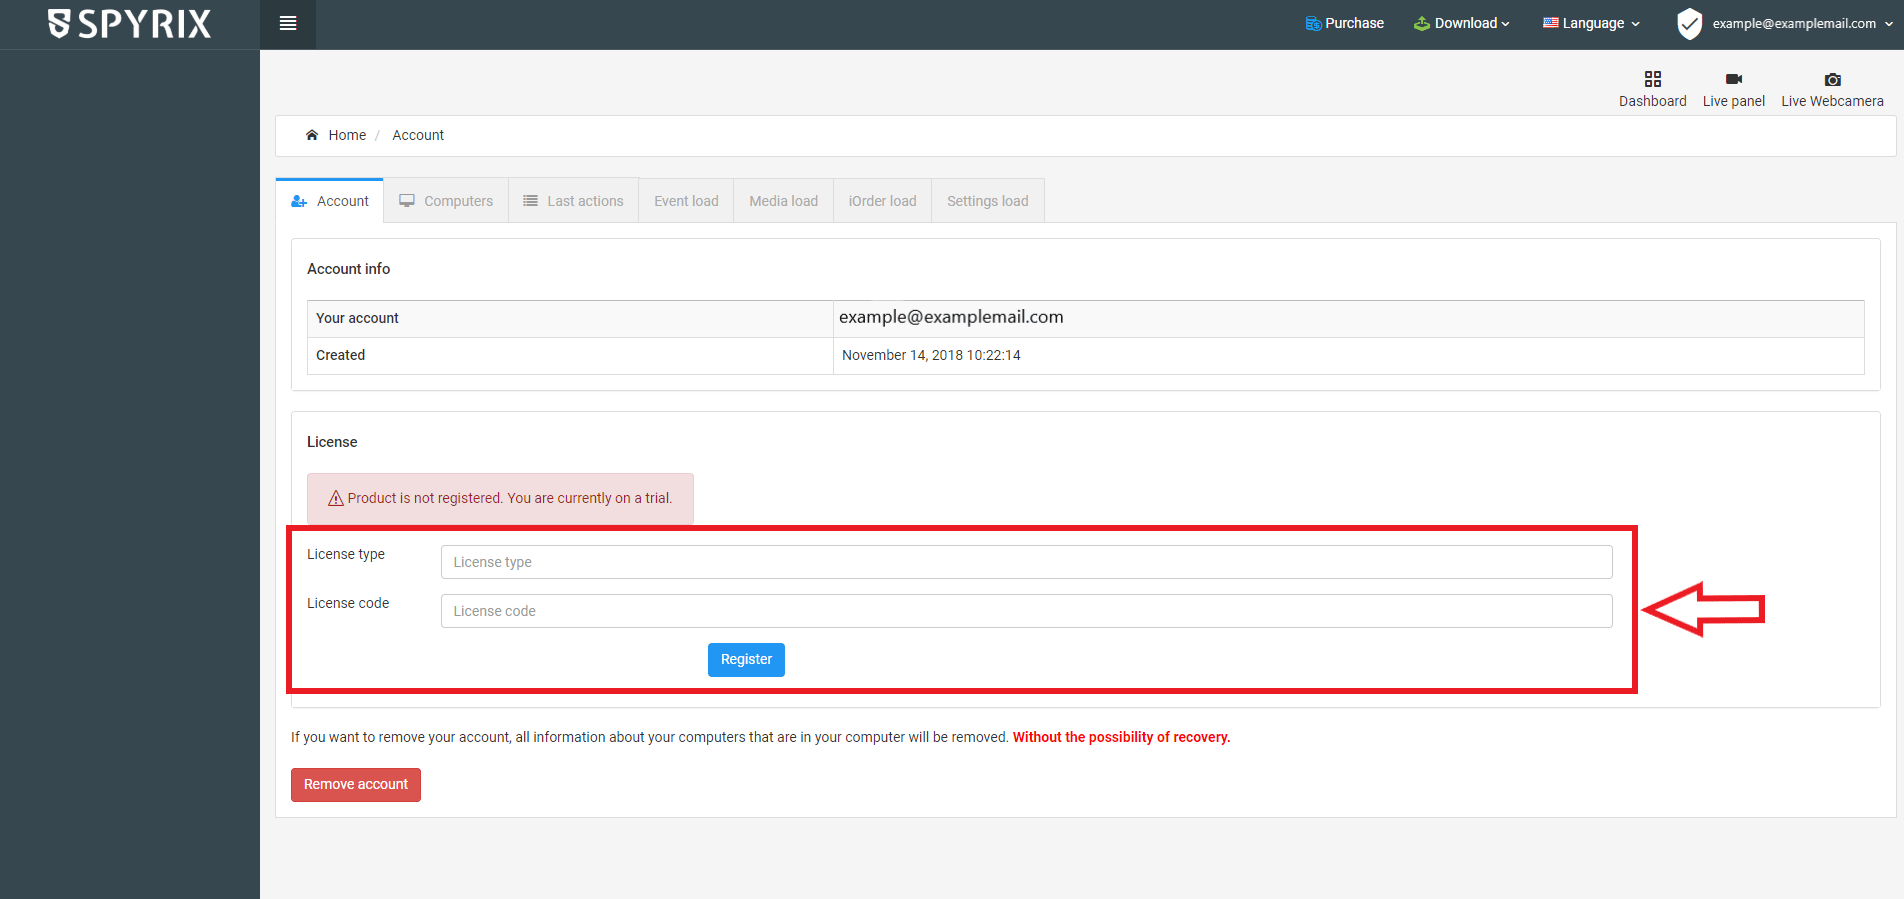
4.2 So registrieren Sie die Lizenz im Online-Dashboard
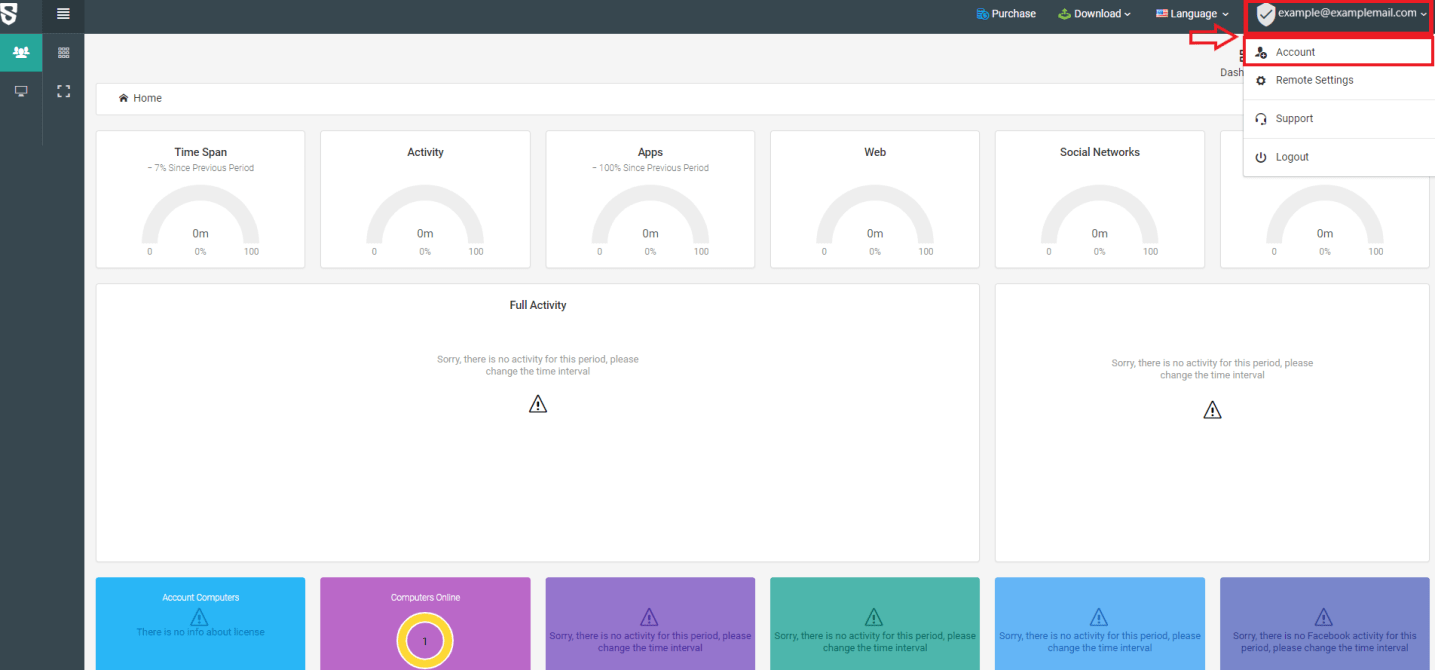
1. Enter your online dashboard, click your email in the top right corner of the screen and select "Account" in the drop-down menu.
2. Enter your license type and license code and click "Register".
5. So richten Sie die Online-Überwachung ein, um alle Daten aus der Ferne zu sehen
5.1 Wenn Sie kein Spyrix-Konto registriert haben
1. Öffnen Sie das Programm. Gehen Sie zu Einstellungen -> Log Delivery -> Registerkarte Online Monitoring
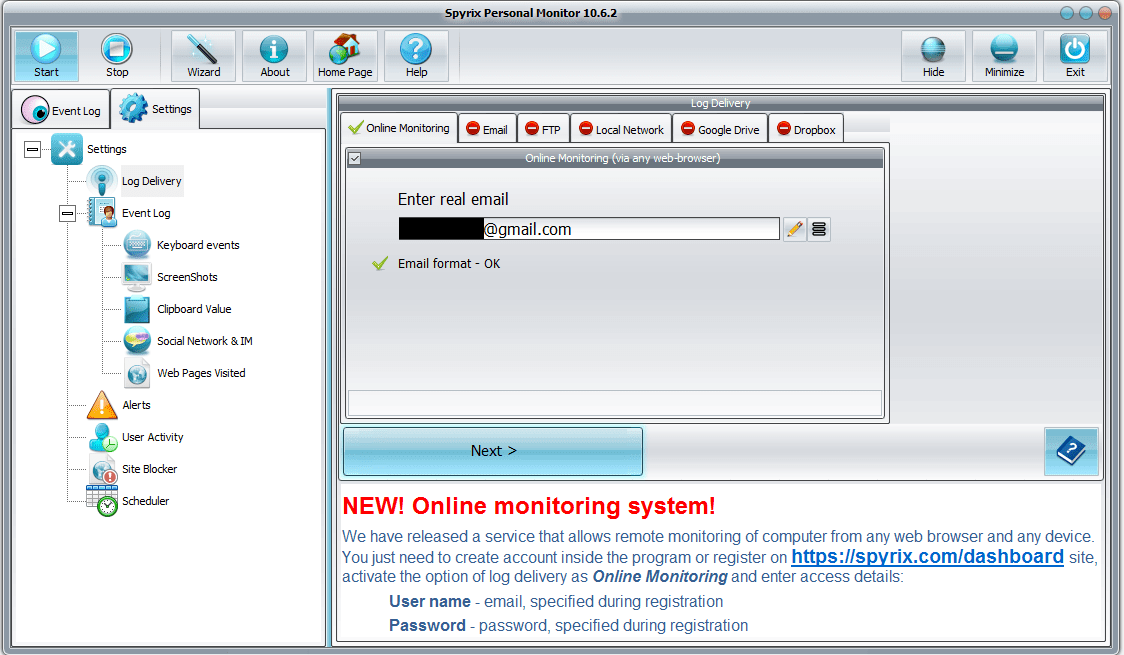
2. Check the box next to "Online monitoring (via any web-browser)" to enable it.
3. Enter your email address, wait for the program to check it, and click "Next".
4. Ein neues Fenster wird geöffnet - klicken Sie auf "Ok", um Ihr Konto zu erstellen.
5. Wenn Sie alles richtig gemacht haben, werden Sie diese Meldung sehen:
6. Jetzt müssen Sie zu Ihrer E-Mail gehen und Ihr Konto aktivieren.
7. Wenn Sie auf den Link zur Kontoaktivierung klicken, müssen Sie ein Passwort für Ihr Konto einrichten, um sich anzumelden.
8. In wenigen Augenblicken werden Sie die ersten Daten in Ihrem Konto erhalten.
5.2 Wenn Sie bereits ein Spyrix-Konto registriert haben
1. Öffnen Sie das Programm. Gehen Sie zu Einstellungen -> Log Delivery -> Registerkarte Online Monitoring
2. Markieren Sie das Kästchen neben "Online-Überwachung (über einen beliebigen Webbrowser)", um sie zu aktivieren.
3. Geben Sie die E-Mail-Adresse Ihres Kontos ein, warten Sie, bis das Programm sie überprüft hat, und klicken Sie auf "Weiter".
4. Wenn Sie Ihre Daten korrekt eingegeben haben, wird diese Meldung angezeigt:
5. In ein paar Minuten erhalten Sie die ersten Daten auf Ihrem Konto.
6. Einstellung der Sendeprotokolle
6.1 So stellen Sie das Senden von Protokollen über Spyrix Security Inc.
Öffnen Sie das Programm. Gehen Sie zu Log Delivery. Wählen Sie die Registerkarte E-Mail und setzen Sie ein Häkchen bei Zustellung per E-Mail.
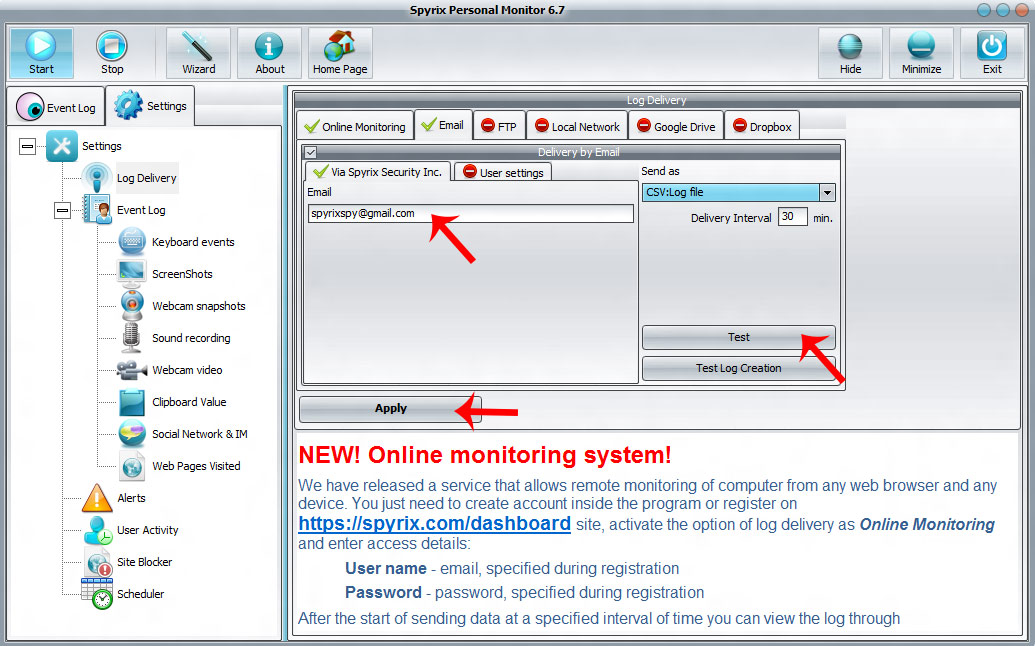
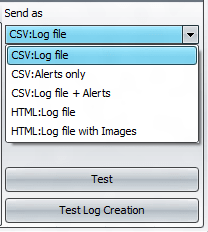
Then in "Via Spyrix Security Inc." window in "Email" field enter your Email, configure Delivery Interval and choose in what form you want to receive a file. By default it is CSV.
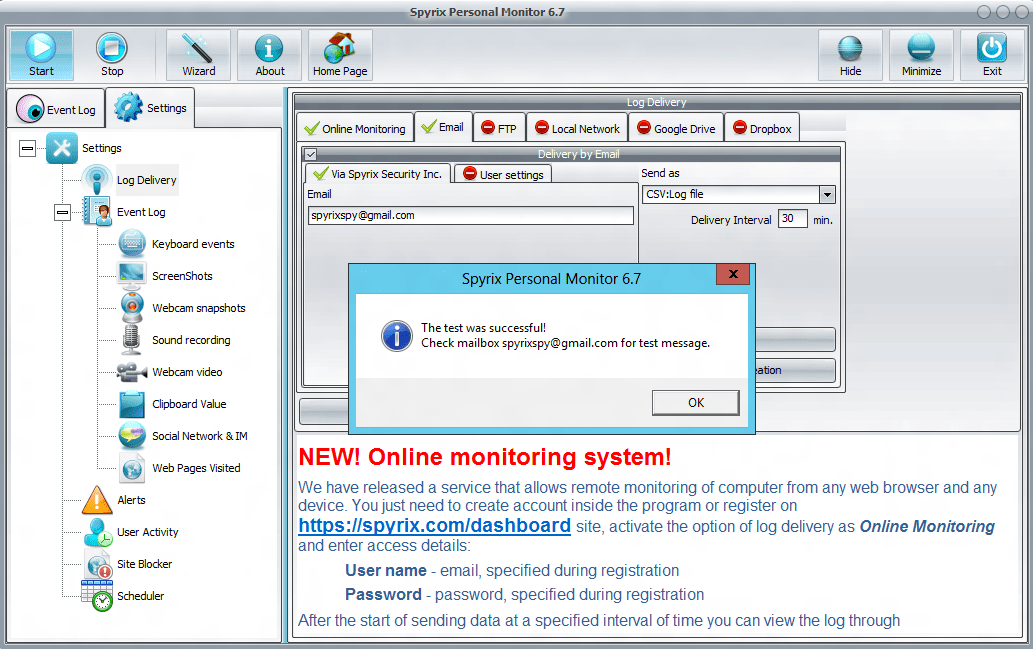
Then press "Apply" and "Test"
Wenn Sie alles richtig gemacht haben, wird eine Meldung über den erfolgreichen Versand der Testnachricht an Ihre E-Mail angezeigt.
You may also check in what form log file will be sent to you. Press "Test Log Creation" in the same window.
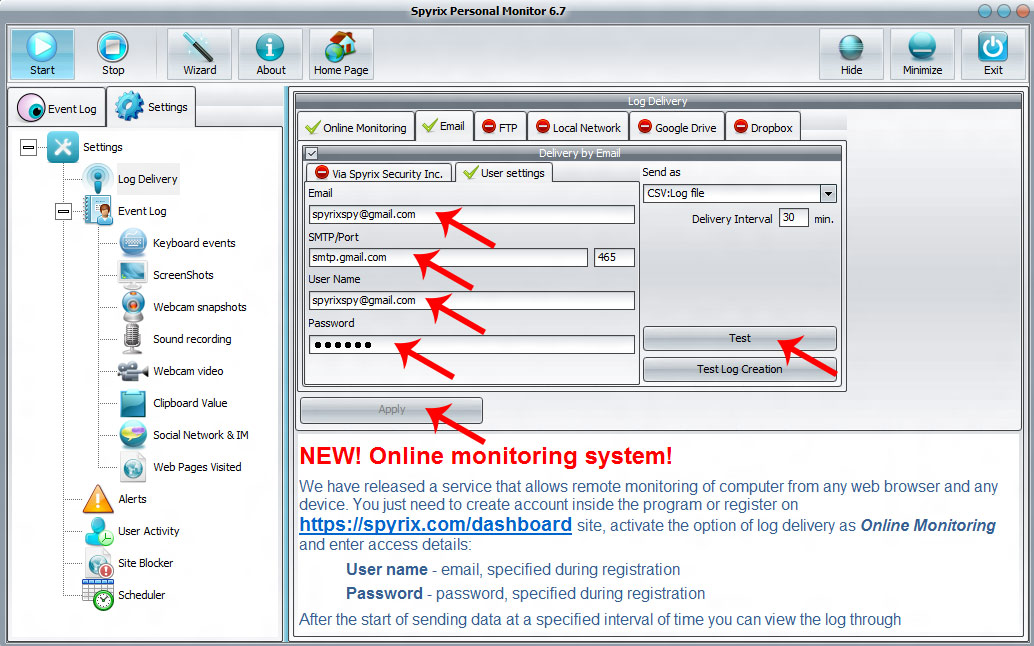
6.2 So stellen Sie das Senden von Protokollen per E-Mail ein
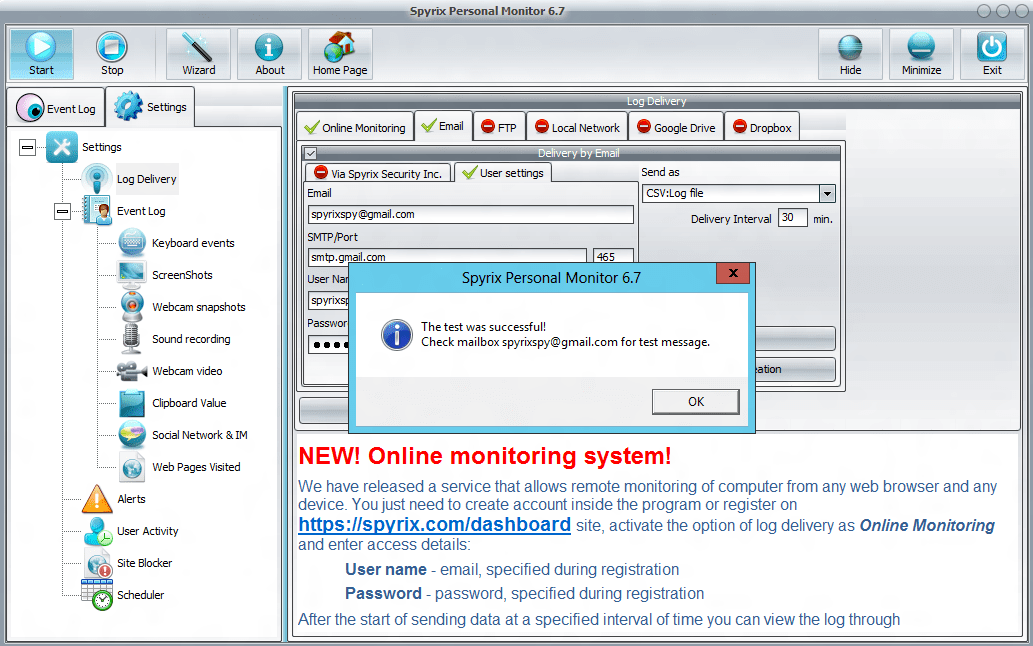
You may also set sending logs to email via your mail service. Press "User settings" tab to do it. Here you should enter your email, SMTP/Port, User Name and Password. After that press "Apply" and "Test".
Wenn Sie alles richtig gemacht haben, wird eine Meldung über den erfolgreichen Versand der Testnachricht an Ihre E-Mail angezeigt.
Diese Einstellungen sind für fortgeschrittene Benutzer. Wir empfehlen Ihnen, die Protokolle über unseren Server zu senden - über Spyrix Security Inc.
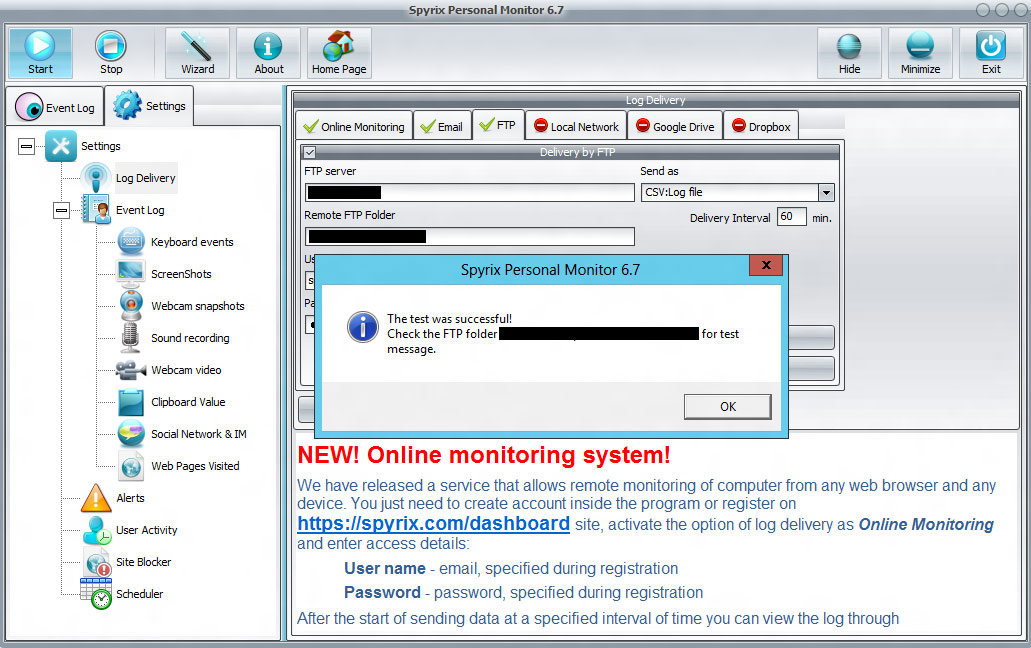
6.4 So stellen Sie den Versand von Protokollen über FTP ein
Öffnen Sie das Programm. Gehen Sie zu Log Delivery. Wählen Sie die Registerkarte FTP und setzen Sie ein Häkchen bei Zustellung per FTP.
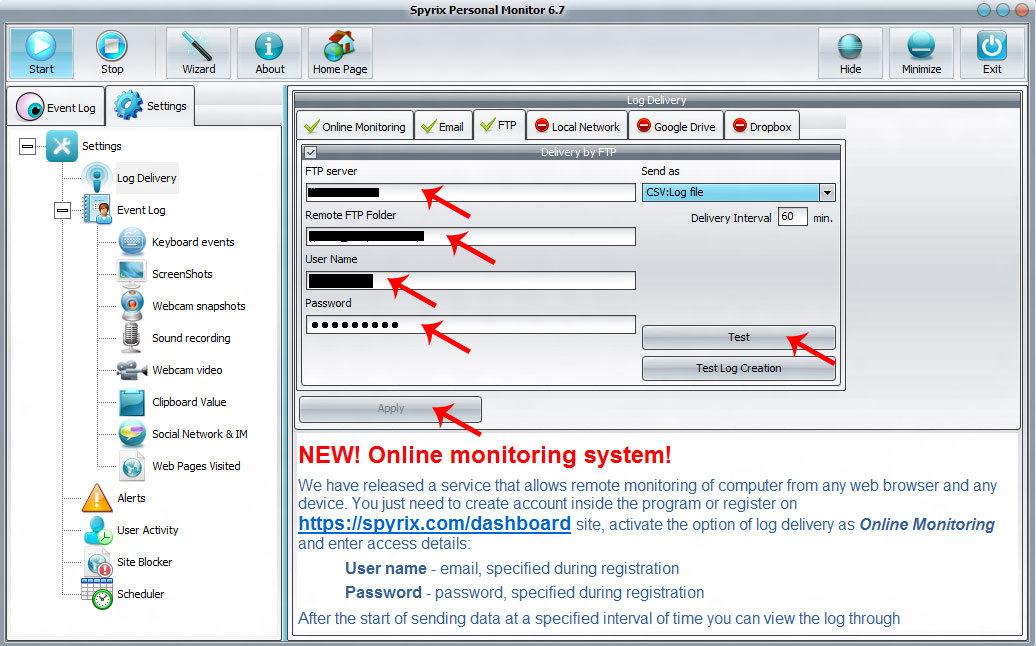
Dann müssen Sie die Felder FTP-Server, Remote-FTP-Ordner, Benutzername und Passwort ausfüllen.
After that press "Apply" and "Test"
Wenn Sie alles richtig gemacht haben, sehen Sie eine Meldung über den erfolgreichen Versand der Testnachricht an Ihren Ordner per FTP.
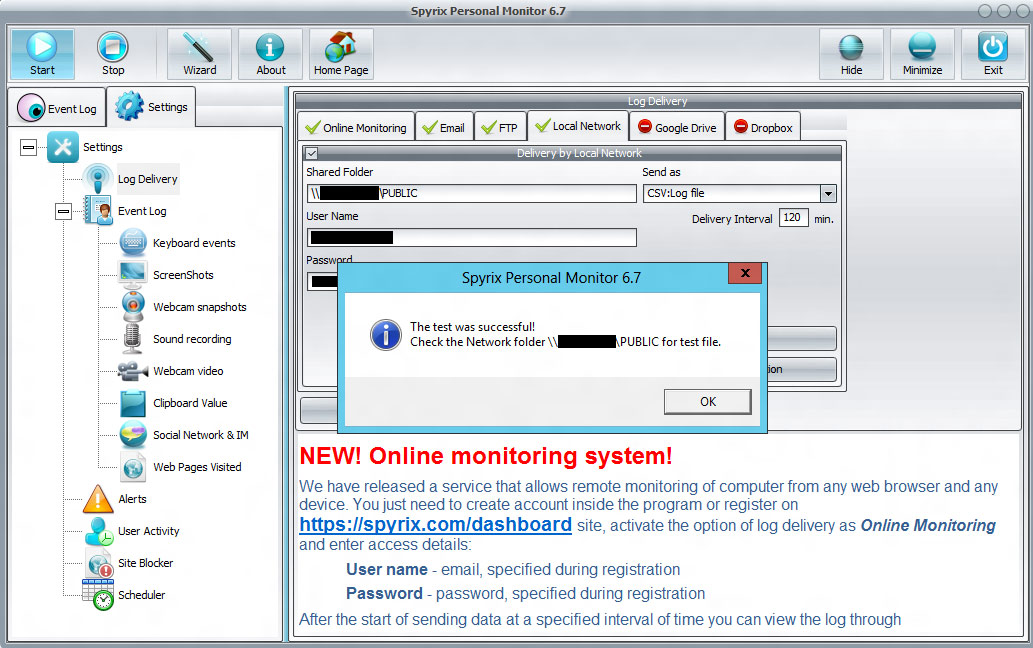
6.5 So stellen Sie das Senden von Protokollen über das lokale Netzwerk ein
Öffnen Sie das Programm. Gehen Sie zu Log Delivery. Wählen Sie die Registerkarte Lokales Netzwerk und setzen Sie ein Häkchen bei Zustellung über lokales Netzwerk.
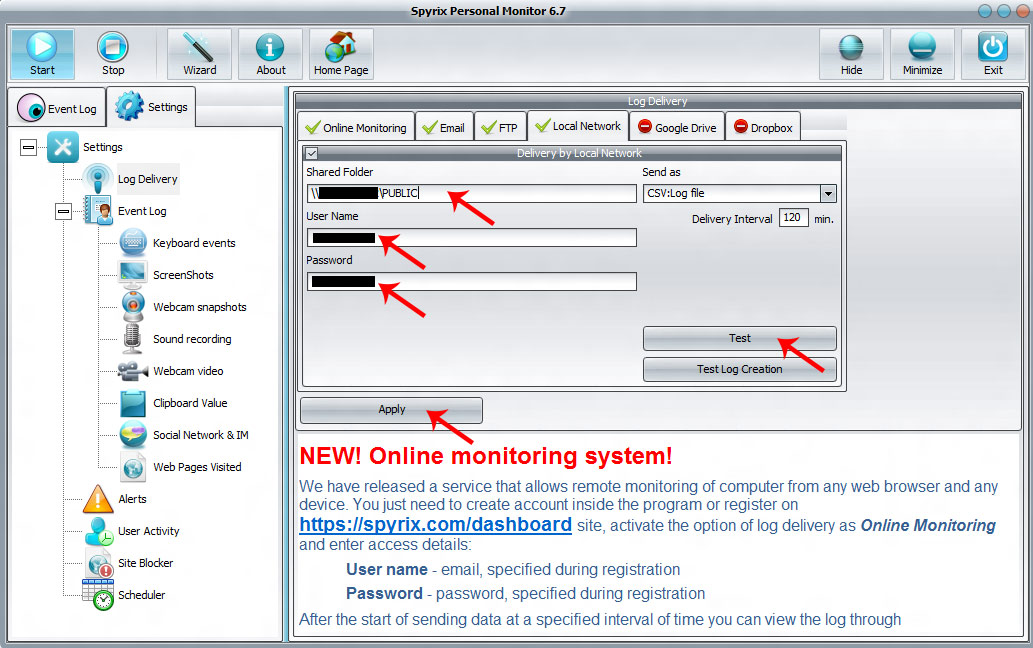
Then you need to fill Shared Folder, User Name and Password fields. After that press "Apply" and "Test". If you’ve done everything correctly, you will see a message about successful sending of test message to your folder in local network.
6.6 Einrichten von Sendeprotokollen über Google Drive
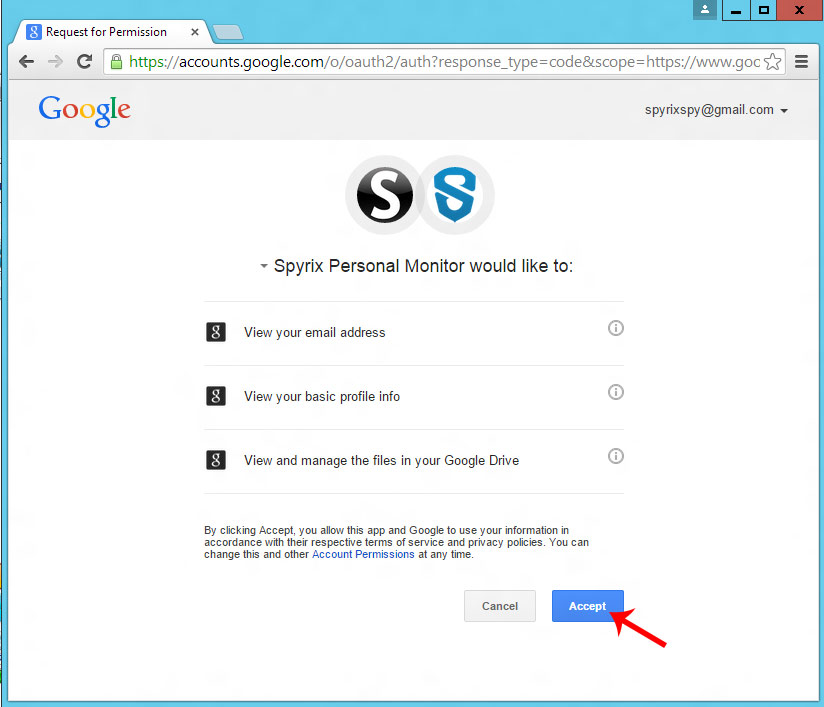
Open the program. Go to Log Delivery. Choose Google Drive tab and place a tick near Delivery to Google Drive. Press "Apply". Then press "Connect the program to your Google Drive Account".
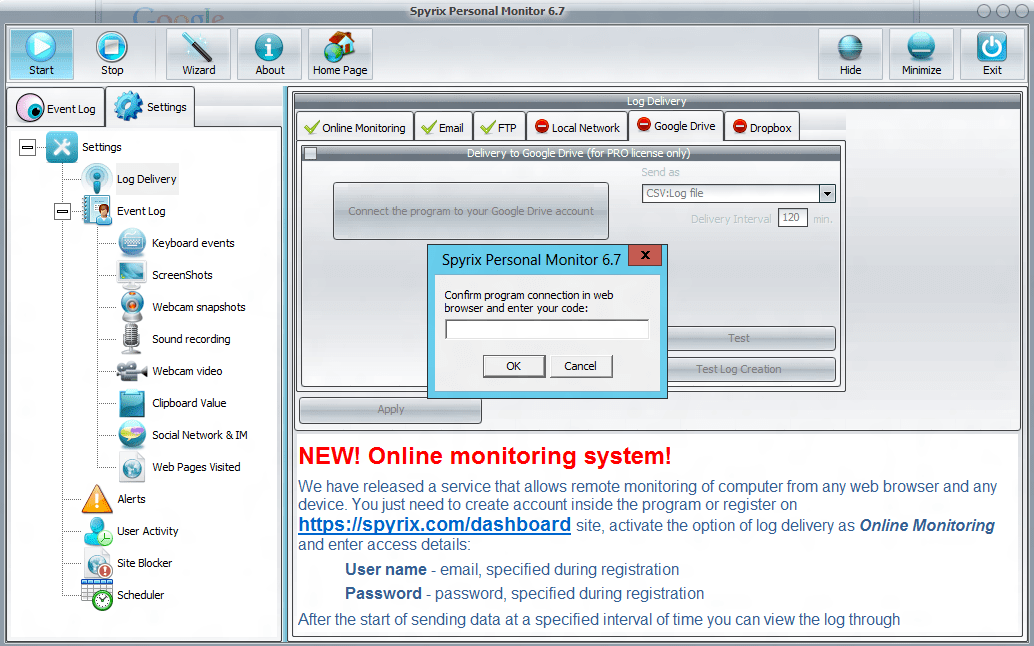
A browser will open and ask you to enter your Google account. Then you will see a program window with a request. Press "Accept".
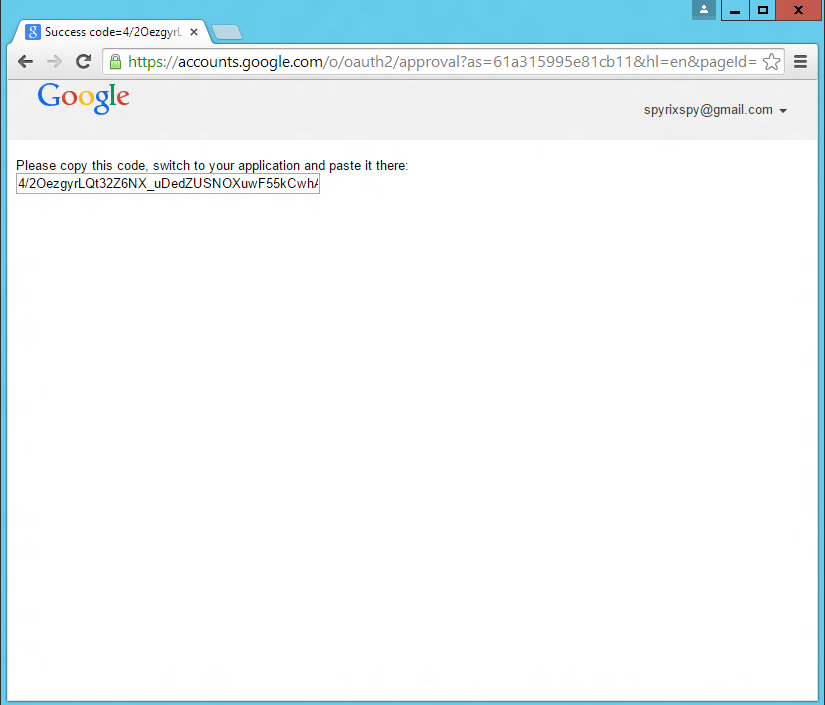
Dann wird ein Bestätigungscode von Google angezeigt. Kopieren Sie ihn und geben Sie ihn in das Programm ein
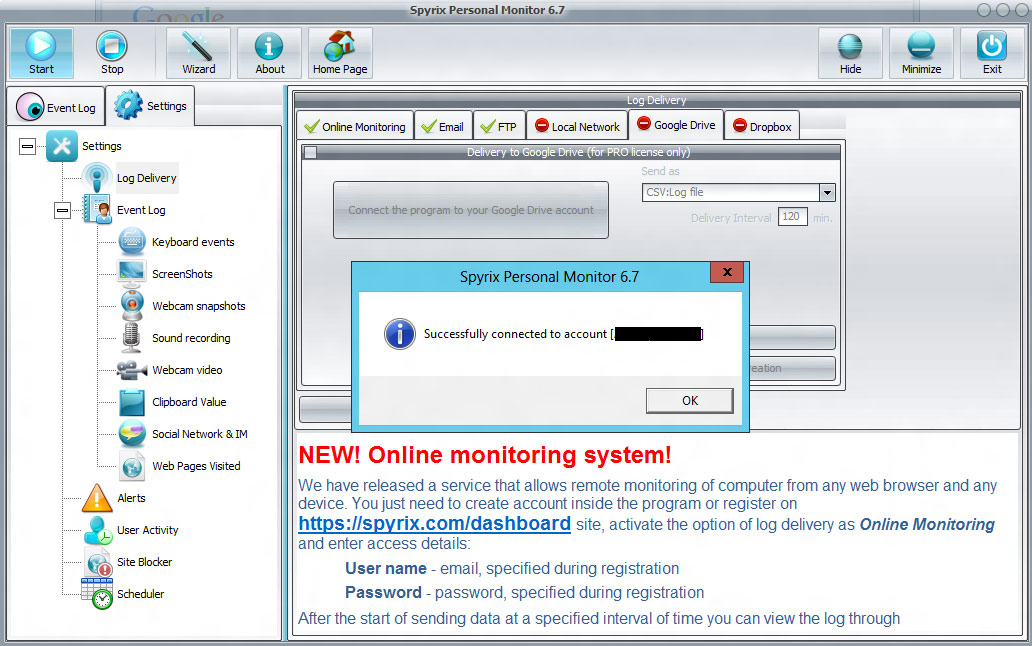
Wenn Sie alles richtig gemacht haben, wird eine Meldung über die erfolgreiche Verbindung mit Ihrem Google-Konto angezeigt.
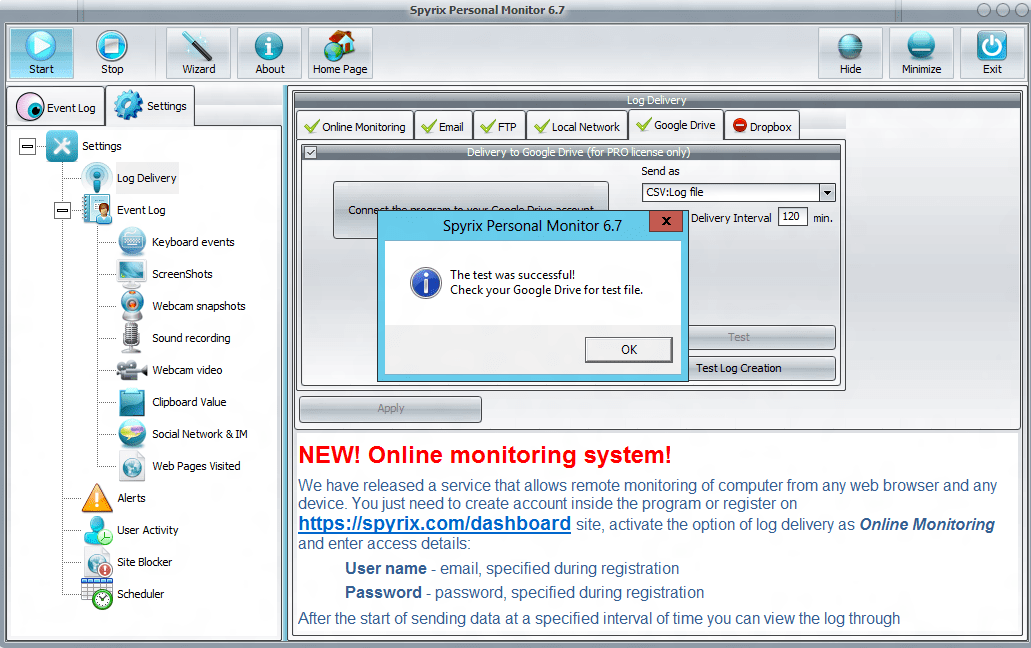
Then press "Test" and you will see a message about successful sending of test message to your Google Drive account.
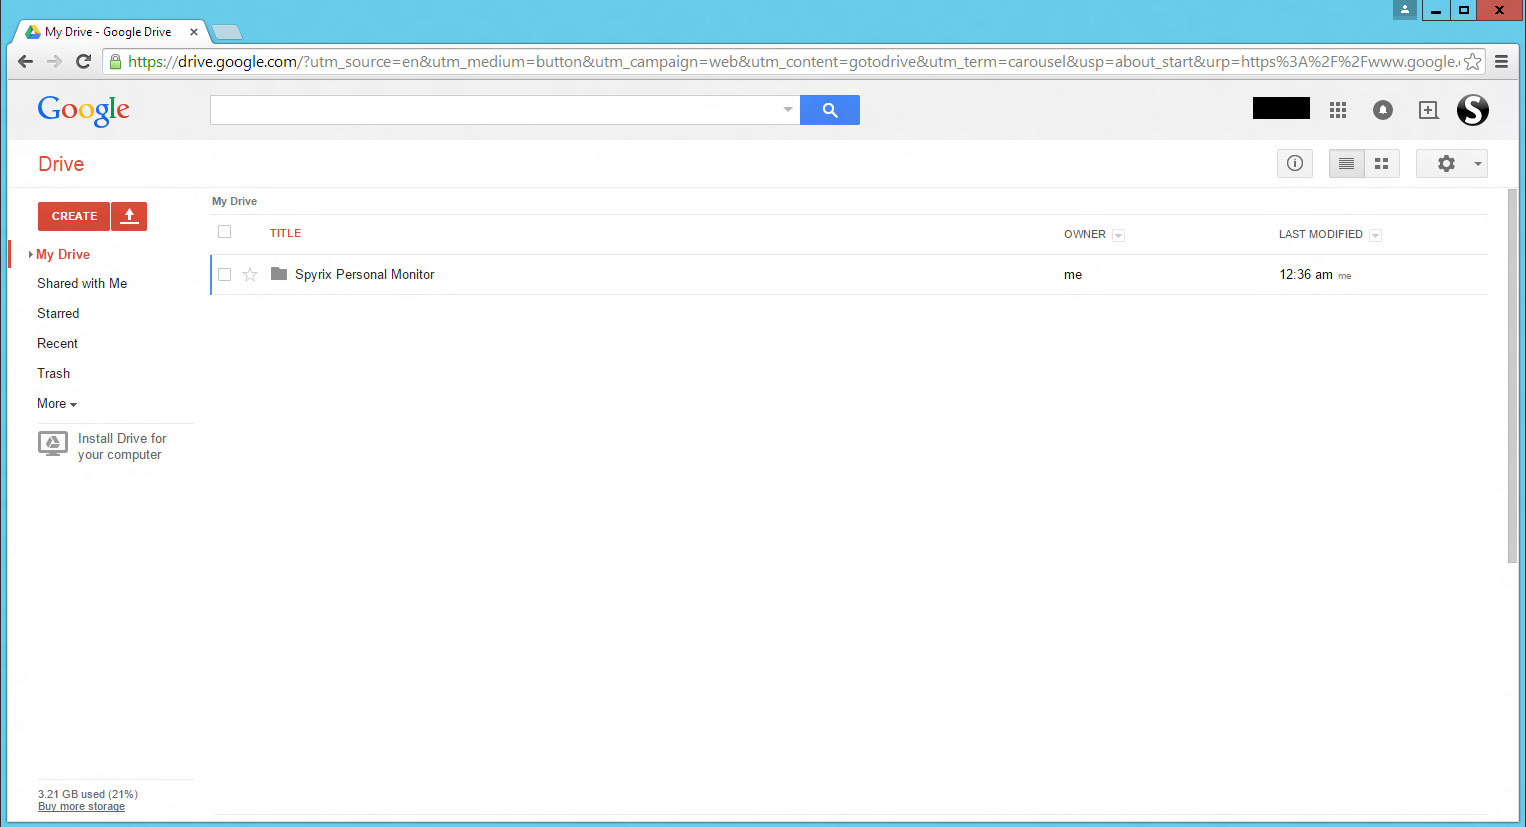
Öffnen Sie Google Drive. Wir sehen, dass der Ordner Spyrix erschienen ist. Die Protokolle des Programms werden an diesen Ordner gesendet.
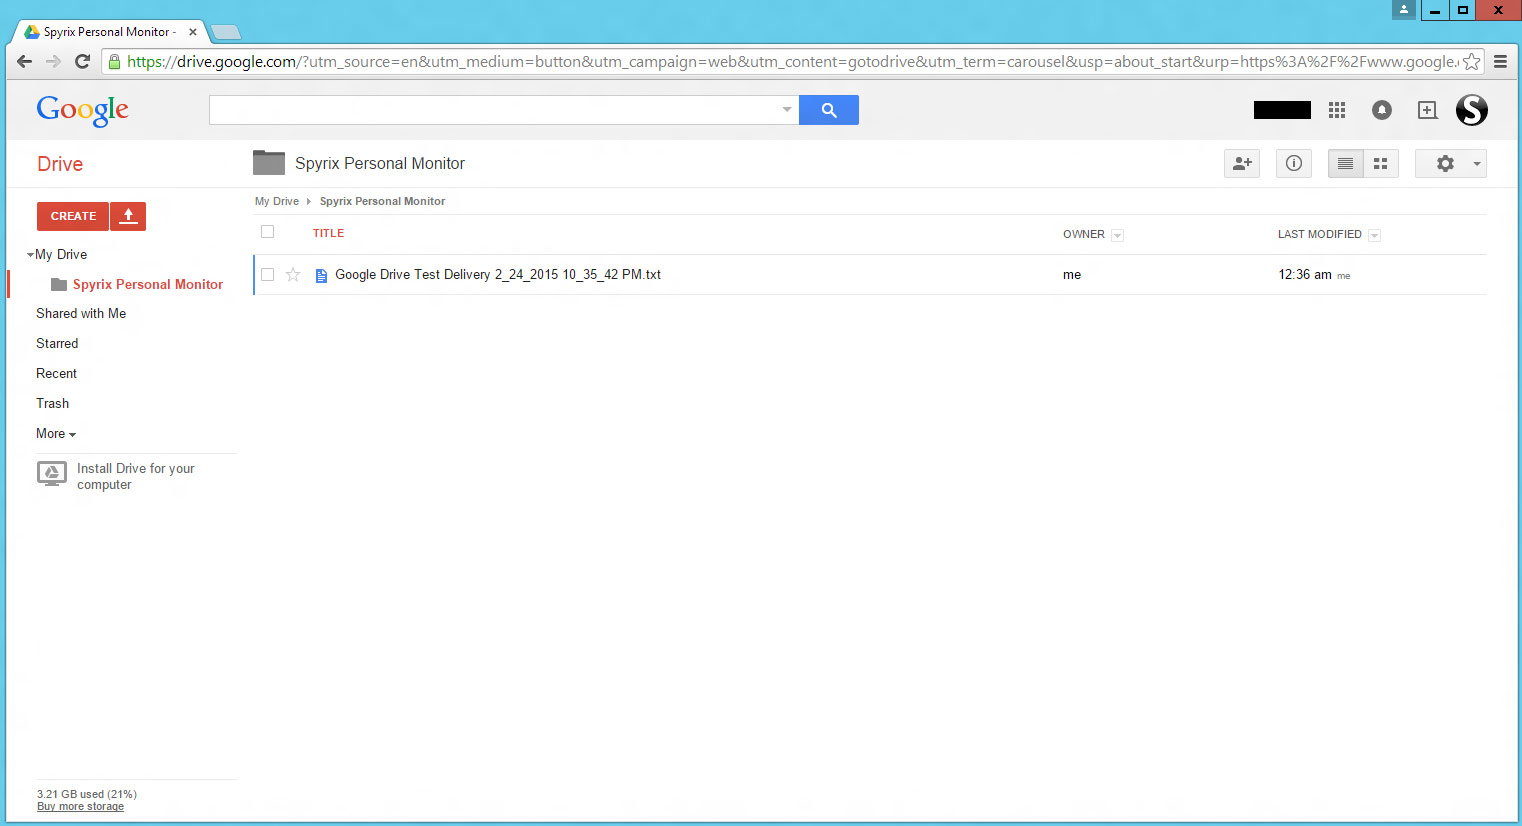
Öffnen Sie den Ordner und sehen Sie unser erstes Testprotokoll.
Öffnen Sie es
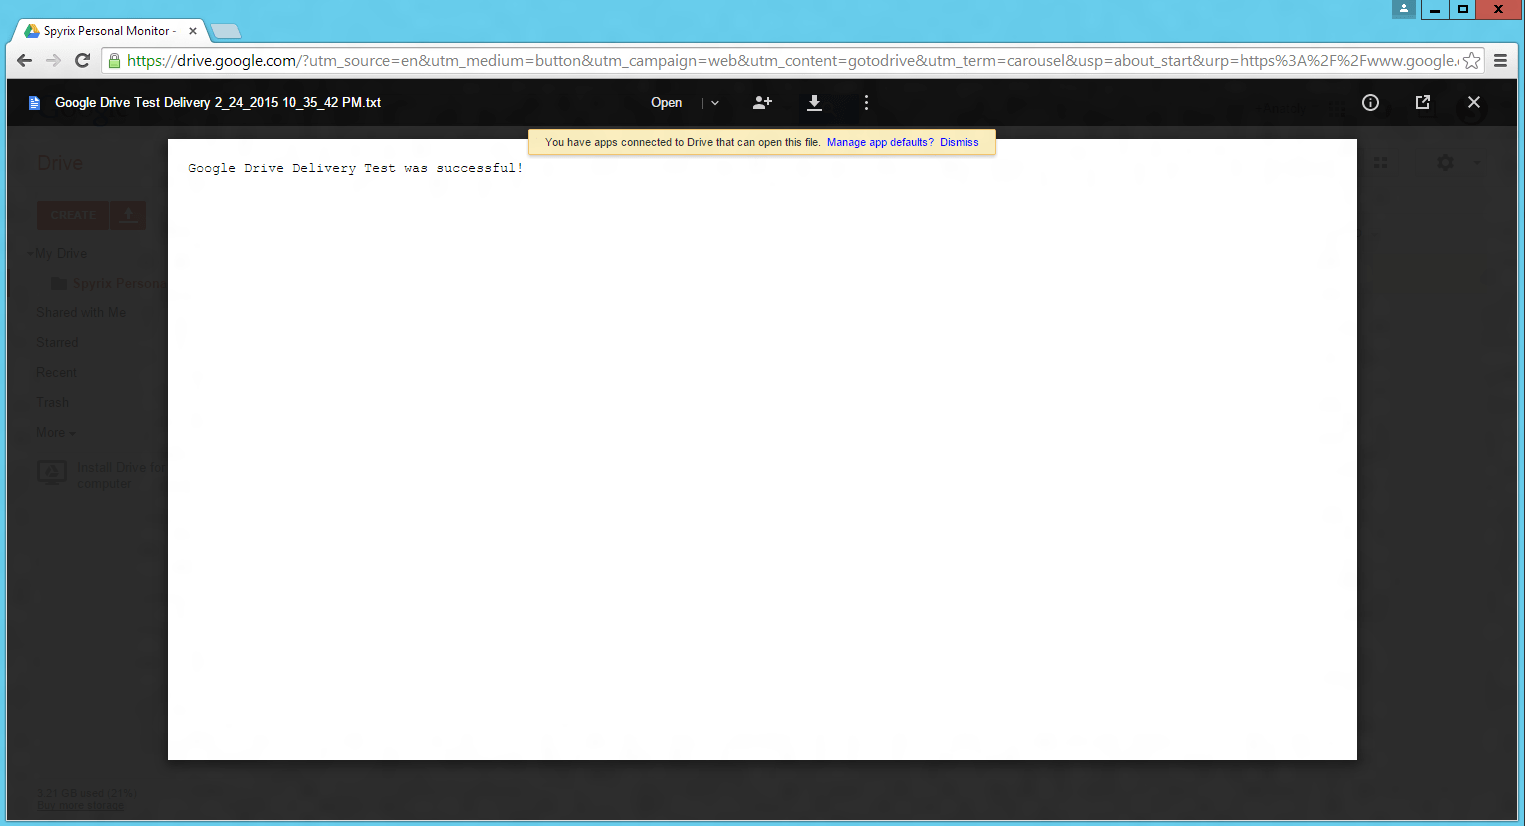
Diese Meldung bedeutet, dass Sie alles richtig gemacht haben.