Windows 用 Spyrix ガイド
Windows 用 Spyrix ソフトウェアをインストールする方法
ウイルス対策を一時的に無効にする
コンピュータにインストールされているウイルス対策ソフトウェアを一時的に無効にします。
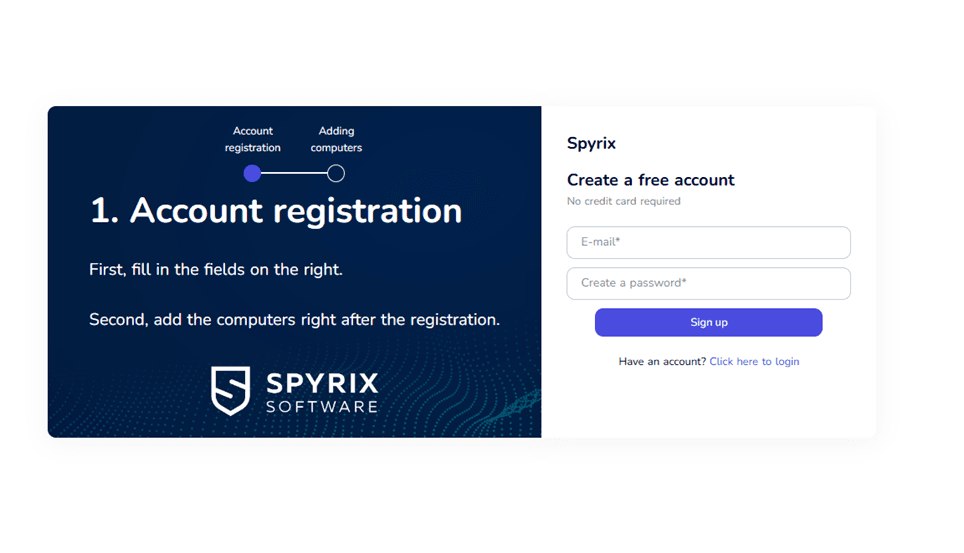
「サインアップ」をクリックします
「サインアップ」ボタンのいずれかをクリックしてアカウントを作成します。

メールアドレスとパスワードを入力してください
メールアドレスを入力し、パスワードを作成し、「Sign Up」をクリックすると登録が完了します。
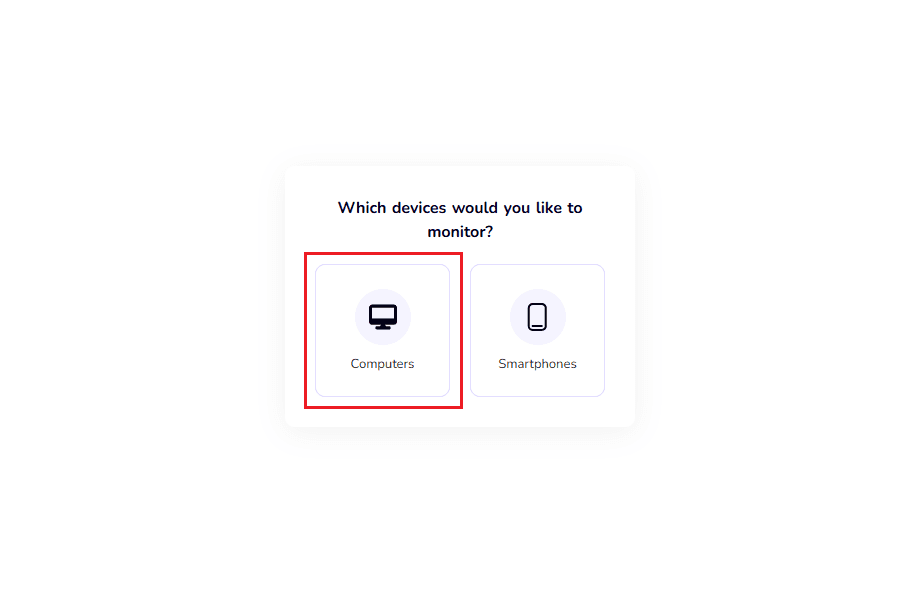
「コンピュータ」を選択します
Windows PC の監視の設定を続けるには、「コンピューター」を選択します。
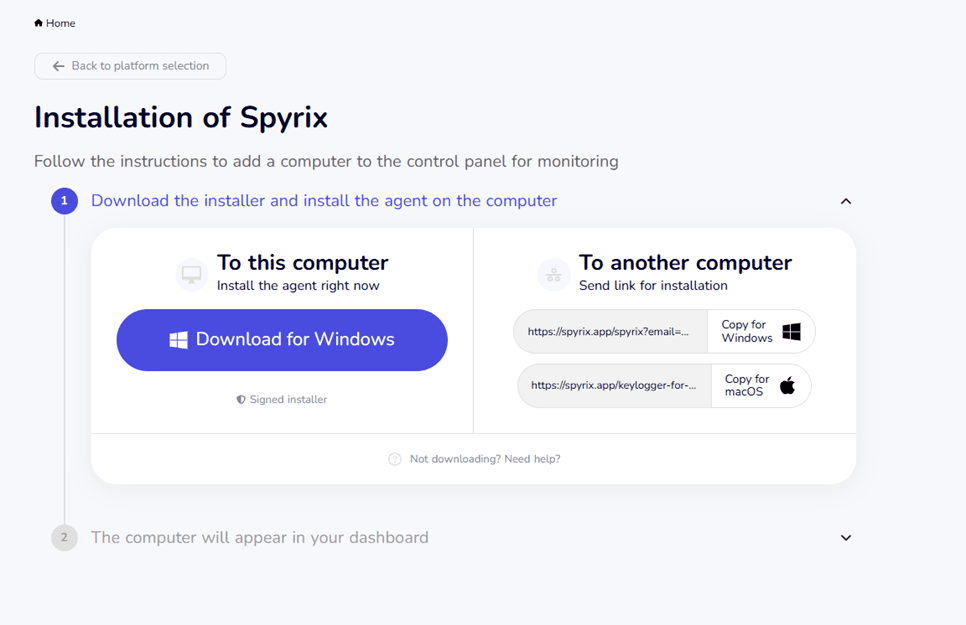
Windows 用のダウンロード
「Windows 用ダウンロード」をクリックして、インストーラーをコンピューターにダウンロードします。
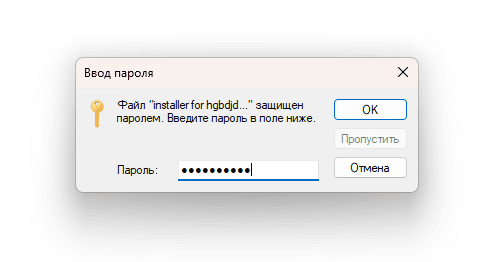
インストーラーを実行する
ダウンロードした Spyrix インストーラーをコンピューター上で実行します。プロンプトが表示されたら、指定されたパスワードを貼り付け、「OK」をクリックし、画面上の指示に従います。
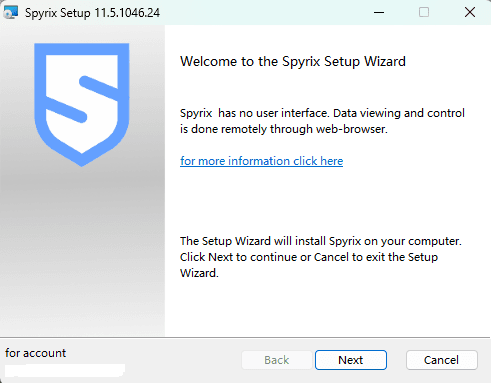
インストールを開始する
「次へ」をクリックして、Spyrix のインストールを開始します。
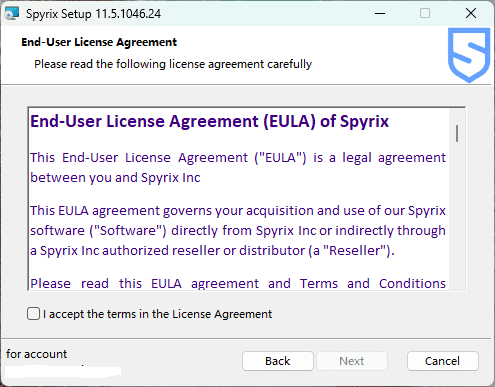
ライセンス契約に同意する
使用許諾契約を確認し、「使用許諾契約の条項に同意します」を選択し、「次へ」をクリックします。
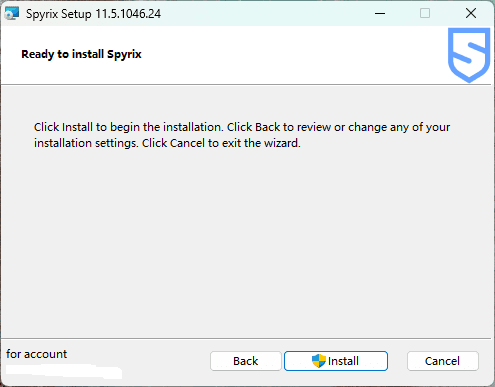
Spyrix をインストールする
[インストール] をクリックして Spyrix のインストールを開始します。
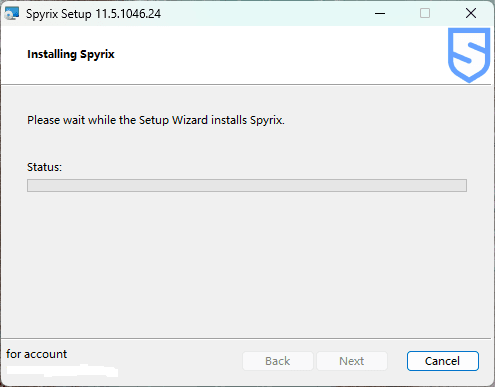
セットアップウィザードを待ちます
セットアップ ウィザードが Spyrix をインストールするまで待ちます。
インストールを完了する
「完了」をクリックしてインストールを完了します。 Spyrix の実行が開始され、データがアカウントに自動的に同期されます。
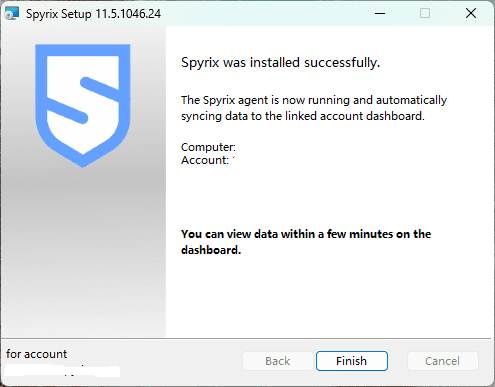
ダッシュボードを開く
[完了] をクリックすると、ダッシュボードにリダイレクトされ、監視対象のコンピューターからのデータが 1 ~ 10 分以内に表示され始めます。
アンインストールガイド
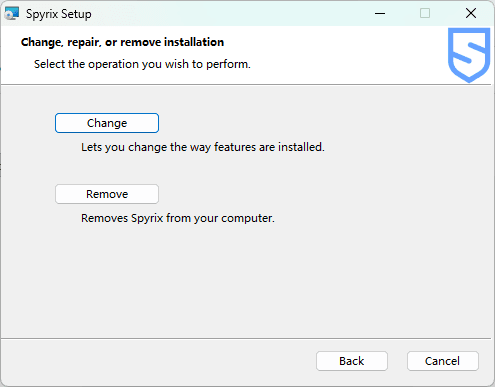
インストーラーを再度実行します
Spyrix のアンインストールを開始するには、インストーラー ファイルを実行し、[次へ] をクリックします。

削除を選択します
「削除」をクリックして、Spyrix をコンピュータからアンインストールします。または、「変更」をクリックして、インストールされている機能を変更します。
ローカルデータを削除する
「はい」をクリックすると、コンピュータに保存されているすべての Spyrix データが削除されます。

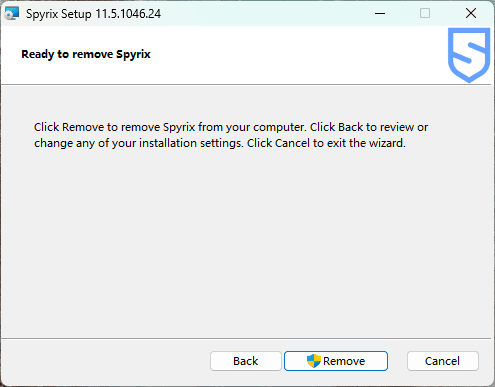
削除の確認
[削除] をクリックして Spyrix のアンインストールを開始します。 Windows からプロンプトが表示されたら、アクションを確認します。
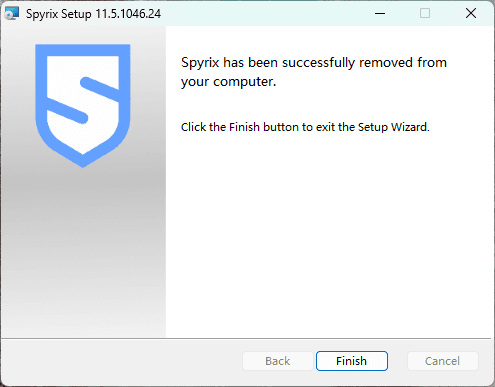
完全なアンインストール
「完了」をクリックしてセットアップ ウィザードを閉じます。 Spyrix はコンピュータから正常に削除されました。